
Table of Contents
Access Digital Ocean’s Droplet via CLI using Putty
![]()
Once you’ve created your Digital Ocean Droplet (VPS – Virtual Private Server) you can now continue working on your brand new server accessing it using the terminal emulator of your preference, I do prefer Secure CRT but I also use time to time the absolutely famous and really well known “Putty“, mainly because is portable, it’s really lightweight and it’s available to be downloaded for free (download Putty and Puttygen from here).
Authentication Method (Password vs SSH Keys)
When it comes to authentication best practices dictate that using the Public key authentication method is the most secure method available nowadays. Digital Ocean allow us to use SSH keys, and fortunately the droplet creation process on the Digital Ocean’s website allow as to easily enter the public SSH key that will be automatically configured on our brand new VPS (Virtual Private Server).
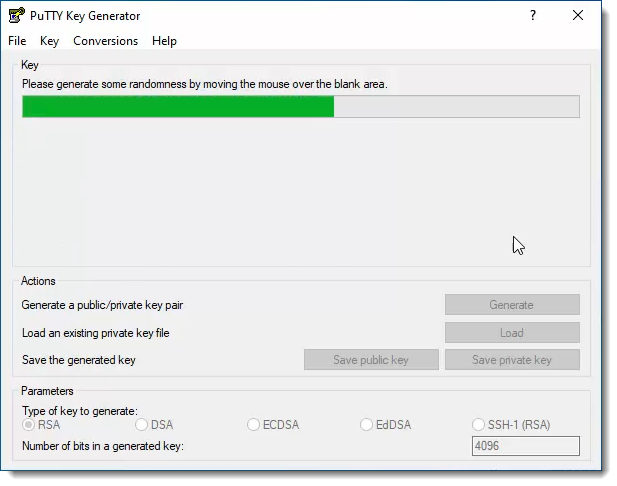
Create SSH Keys using a Puttygen
Only one thing is requested from us, we must do the homework before and have both the Public and also the Private SSH keys ready to be used, here is where the Putty generator tool provided by Putty developers must be used.
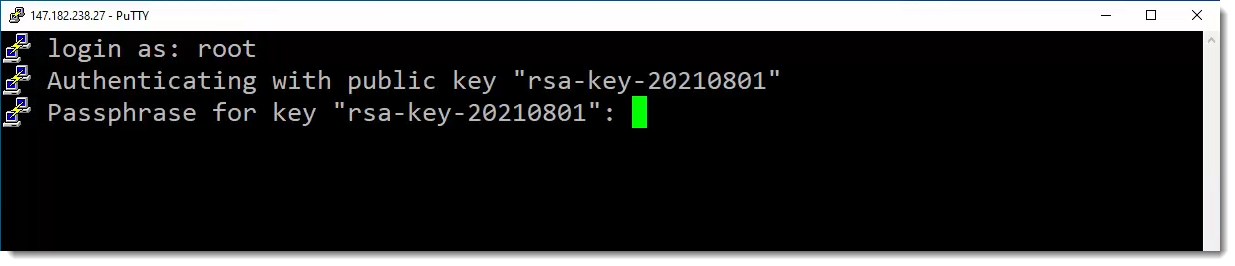
Protect your SSH Private Key using a Passphrase
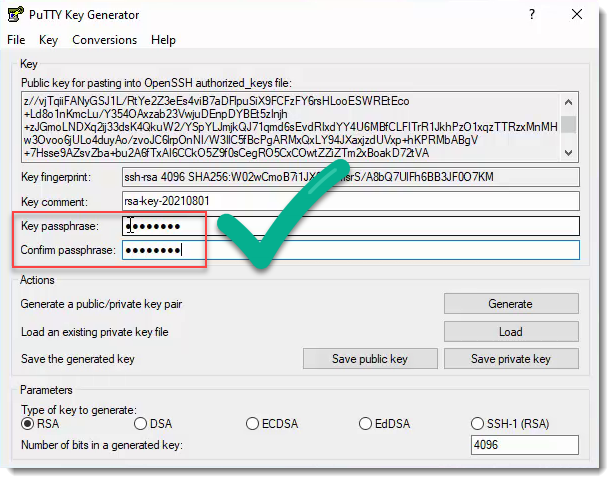
It is not mandatory, but it is always a good idea to protect your Private SSH key with a Passphrase. A Passphrase is a sort of password that will be necessary to be able to use the private key, the terminal emulator of your choice (in our case Putty) will ask to enter the passphrase to allow access into the server (see image below) that way no one can use it unless the passphrase is provided.
Putty SSH Keys generator, save both keys
Putty Generator makes that step really easy, as soon as the pair of keys is created you can enter the passphrase and after that do not forget to save both the public and also the private keys on your computer, see image below.
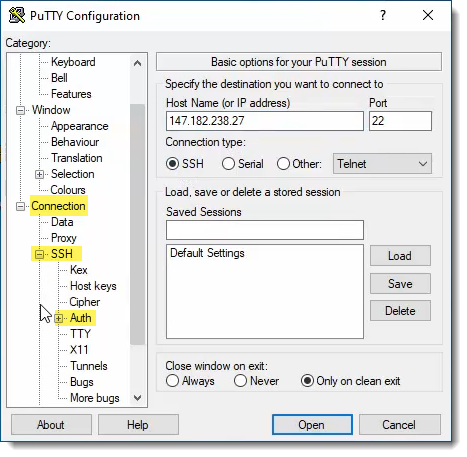
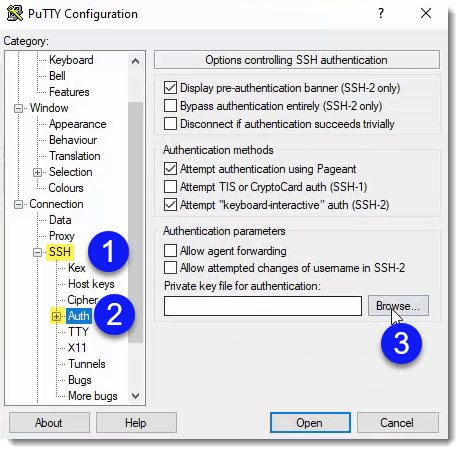
Putty configuration, mapping SSH private Key
I hope that at this point in time it is clear that the Public SSH Key is the one that must be copied to the remote server, now what to do with the Private SSH Key? Well, the Private Key must be mapped to your Terminal Emulator session, this step usually require to browse the folders on your computer until you reach the location of the Private SSH Key.
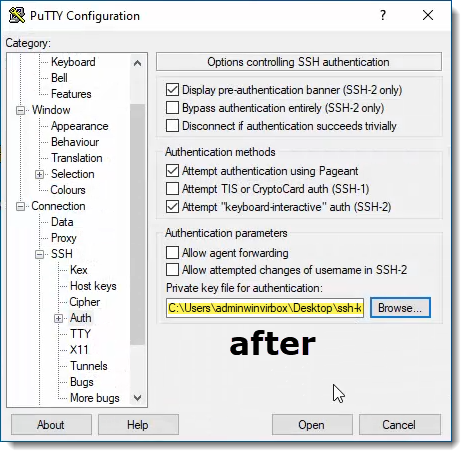
If the above images are not clear enough then You can take a look at this article to see an animation and learn how to map the Private SSH Key on Putty.
How to clear the screen?
I know that clearing the screen is something already well known for most of You, but I also know that some visitors are beginners terminal’s users , so for them the following animation.
clear
Feel free to use the command above, hover your cursor over the up right corner of the box to see the COPY option that allows You to quickly copy the code with a simple click.
![]()
Where to go next?
Congratulations! The dirty job of SSH Keys & configuring your Putty session has been completed, from here the possibilities are endless, the entire world of Linux is now open to You, our recommendation for You is to perform a System update before starting building your server, this is also a simple process that involve only two steps, take a look at the following article: