
Special Offers & Promo Codes
Use my referral link below to get $100 in Free Credit over 60 days.
Redeemable after You’ve spent $25 on any Digital Ocean product.
How to create a Digital Ocean Droplet
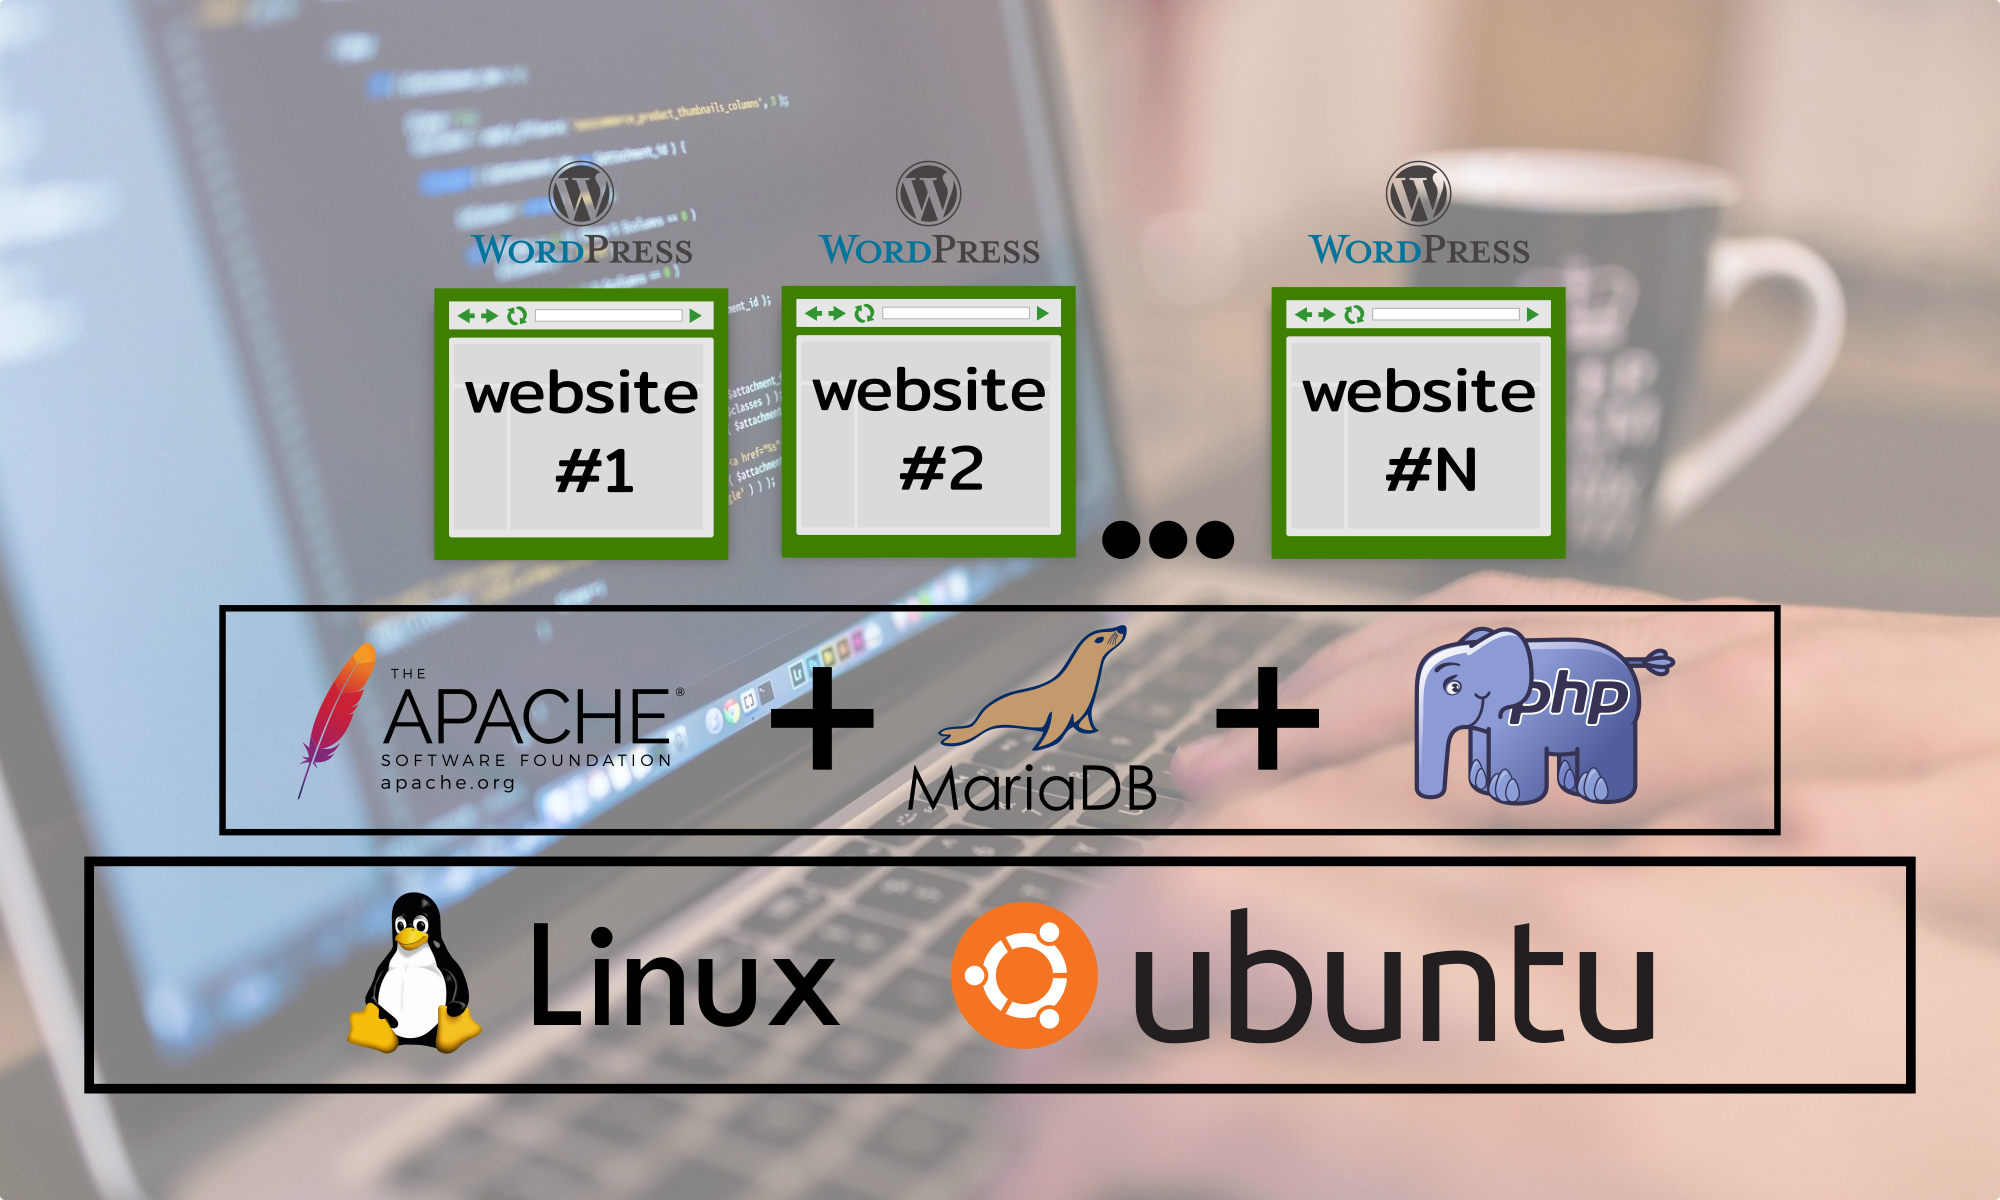
Even though the commercial name is “Droplet” we’re just talking about a VPS (Virtual Private Server) on which you can select not only the OS (Operating System) but also the technical specifications, things like CPU, RAM, DISK and Bandwidth are available for you to create an “a la cart” VPS.
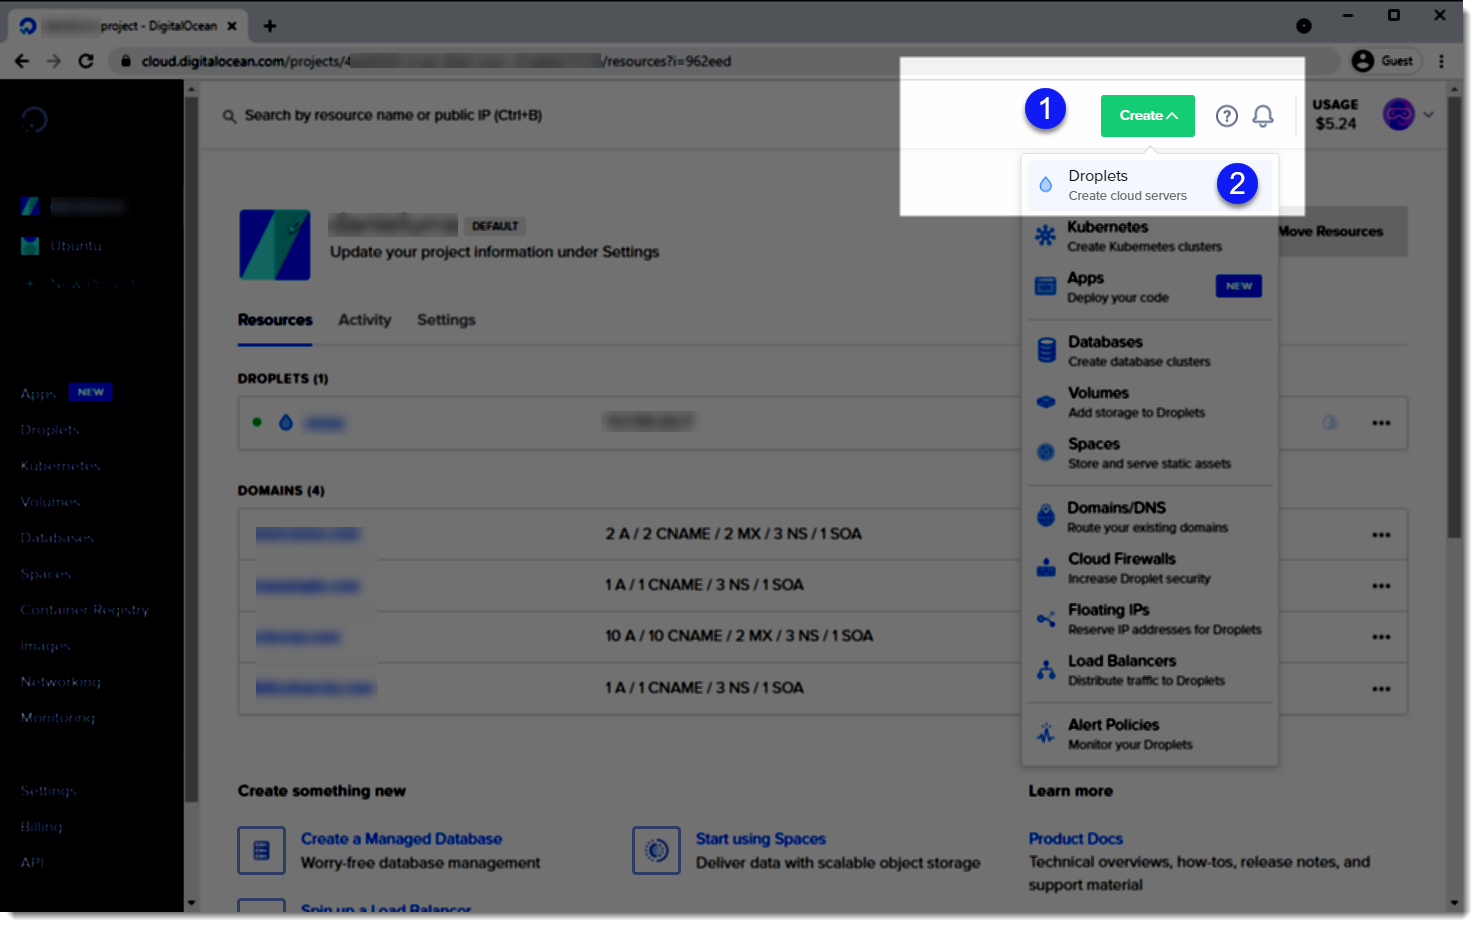
Step 1 – Select Create Droplet
There is a big button on the up right corner that actually works as a drop-down menu, the first option of the list is the one that has to be used to start the process to create a Digital Ocean droplet, as you can see in the image below.
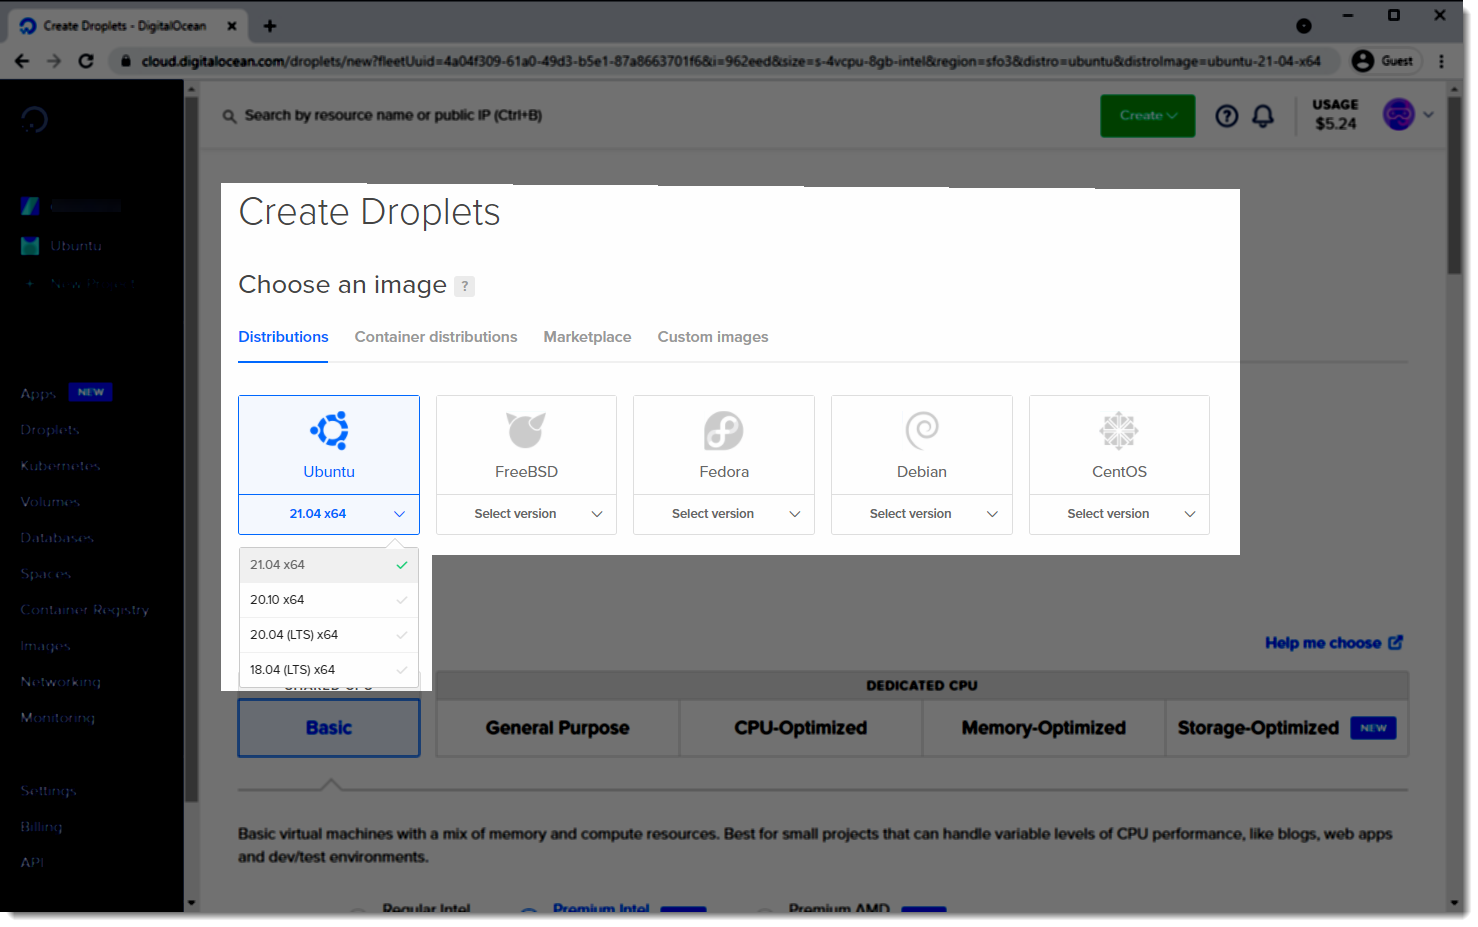
Step 2 – Select Operating System and OS version
Immediately after choosing the creation of a droplet you must choose the Operating System that your VPS will be based on e.g. Linux Ubuntu, Fedora, Debian, etc. different versions of each available OS are there for you to choose.
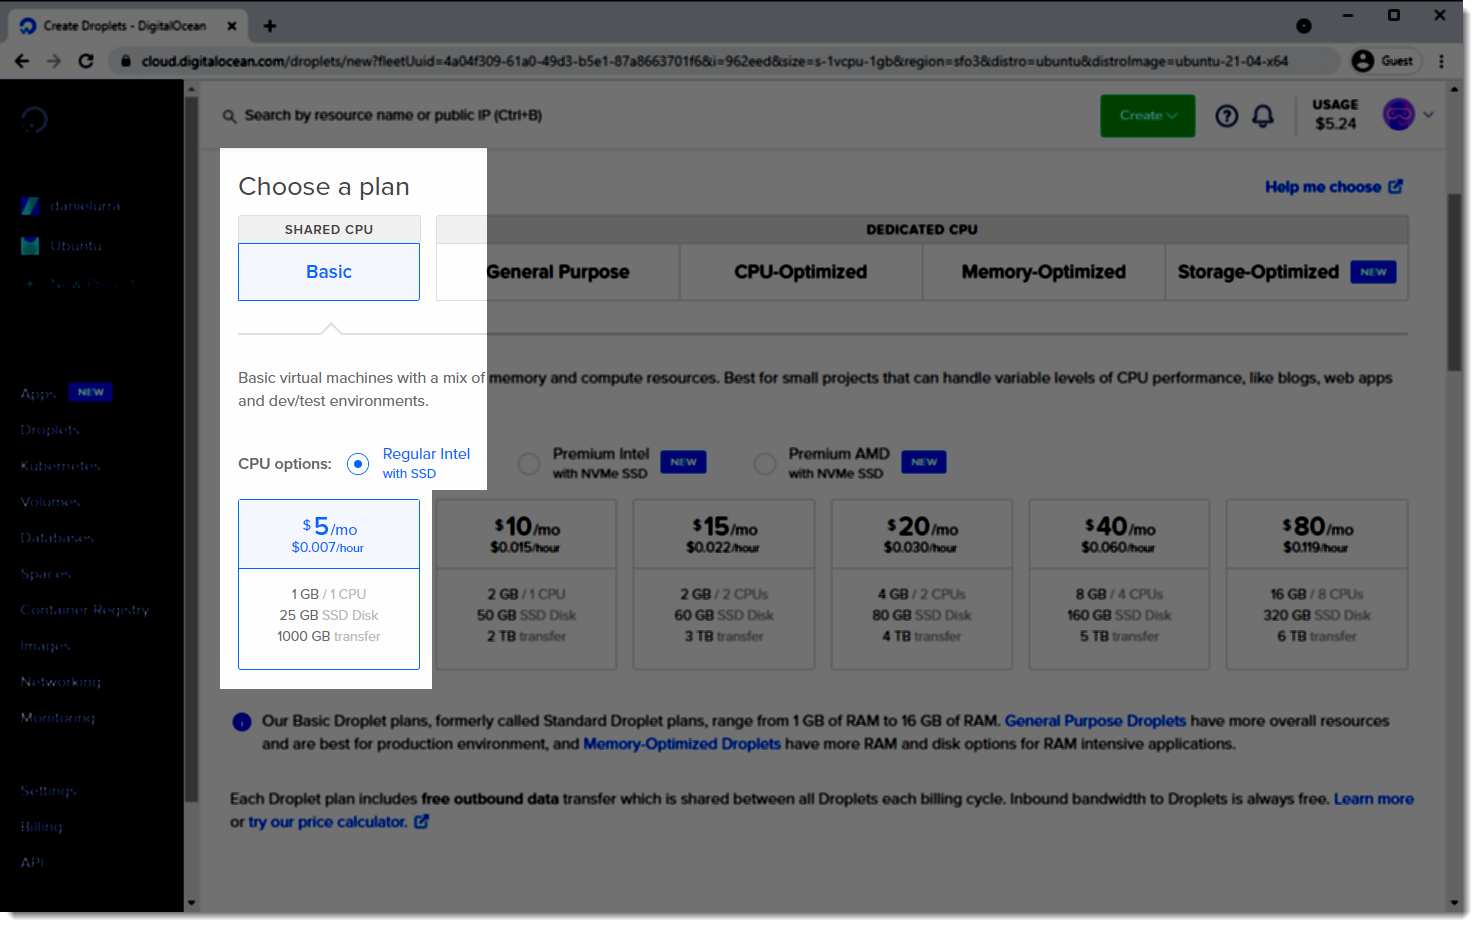
Step 3 – Choose a Plan
A huge amount of plans are available to choose, most of us will start with the cheapest option, at the moment of the creation of this tutorial the cheapest one is the $5/month plan that allows you to have a 1vCPU, 1GB of RAM and 25 Gb SSD disk with 1000Gb transfer, see image below.
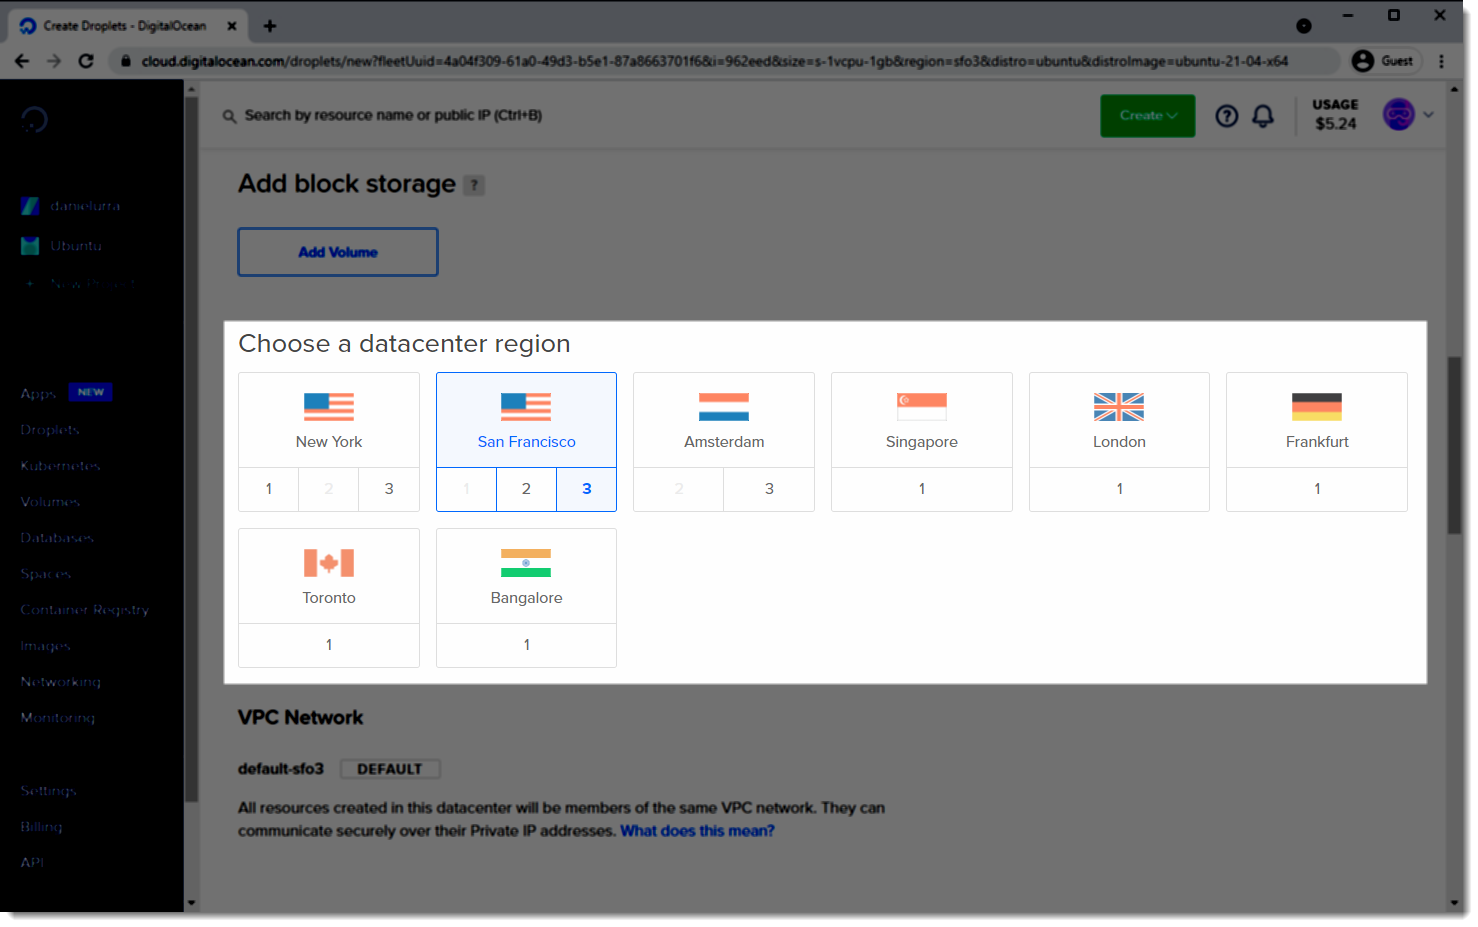
Step 4 – Choose Data Center location
Data Center well distributed through all the world are available for you to choose the best location for your project, North America, Europe and Asia.
Step 5 – Additional Options (monitoring)
From the additional options we’re going to select only one of them, the one that has to be with “monitoring”, this option will allow us to see more details and enhanced graphs to see how our droplet is being used. Digital Ocean allow us to run the “Metrics Agent” during the droplet creation or manually using the CLI once the droplet was created, the final outcome is the same, so this really is up to you.
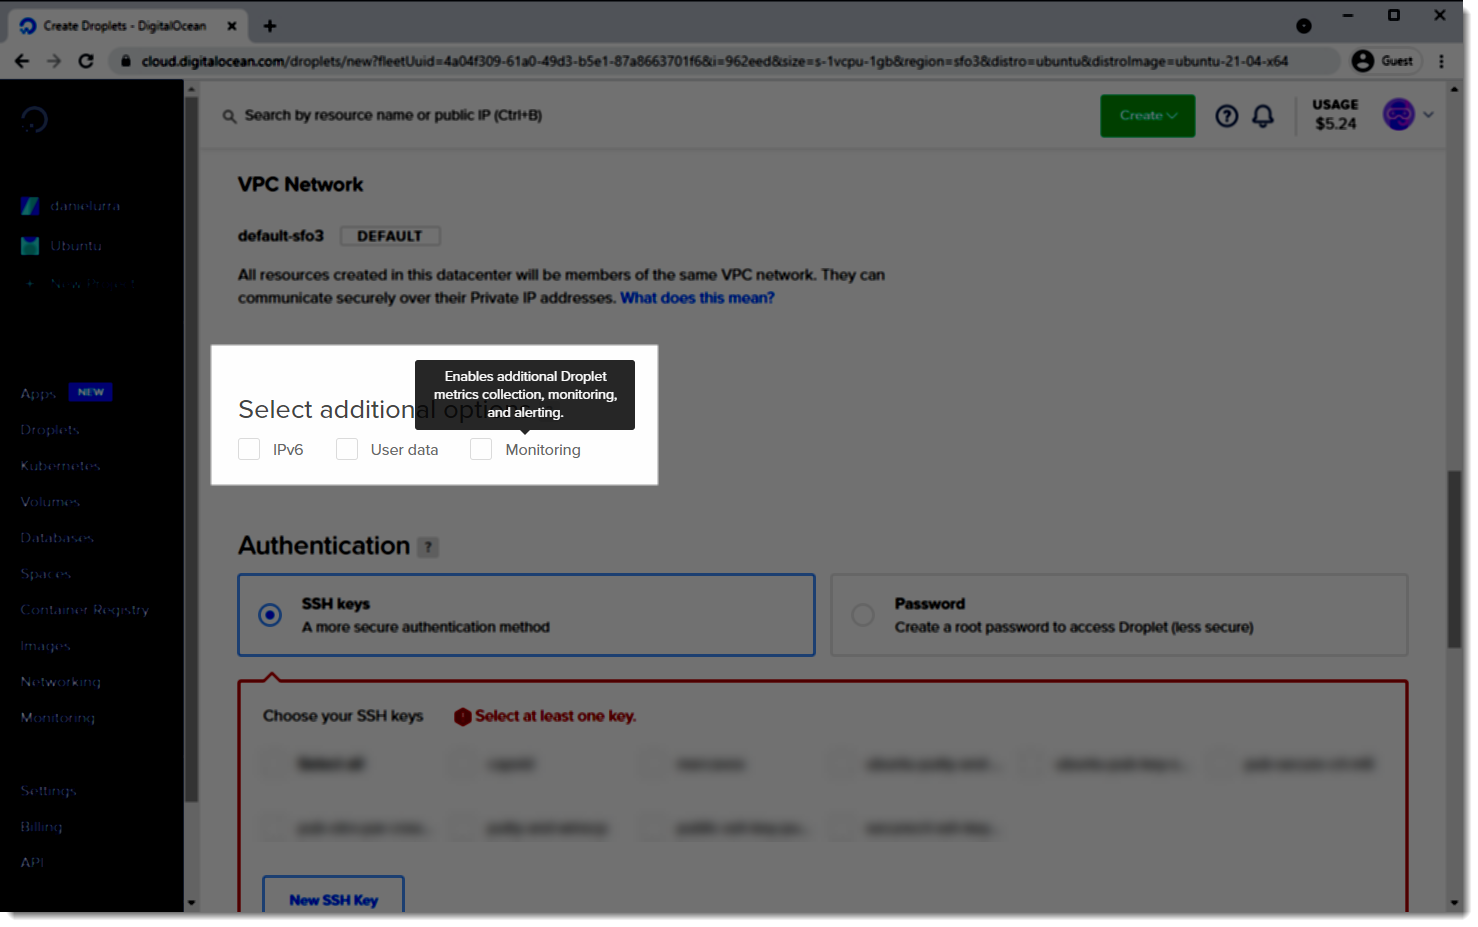
Step 6 – Authentication ( SSH Keys or Password)
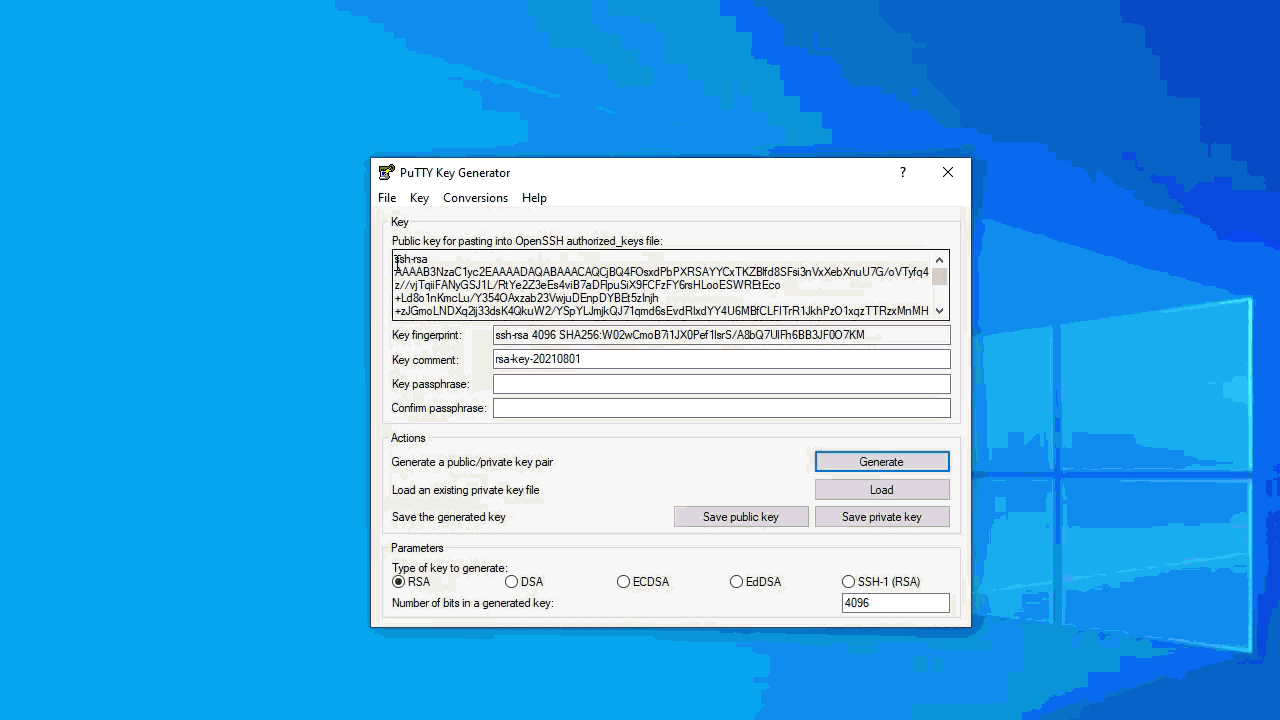
When it comes to authentication I do recommend to use SSH Keys that are a most secure method compared to just password, I know it requiere a little bit of homework before starting the creation of the droplet because you have to first create a pair of SSH public/private keys and have them handy ready to be used, you can create SSH keys easily using Putty generator (puttygen) or another tool e.g. Secure CRT.
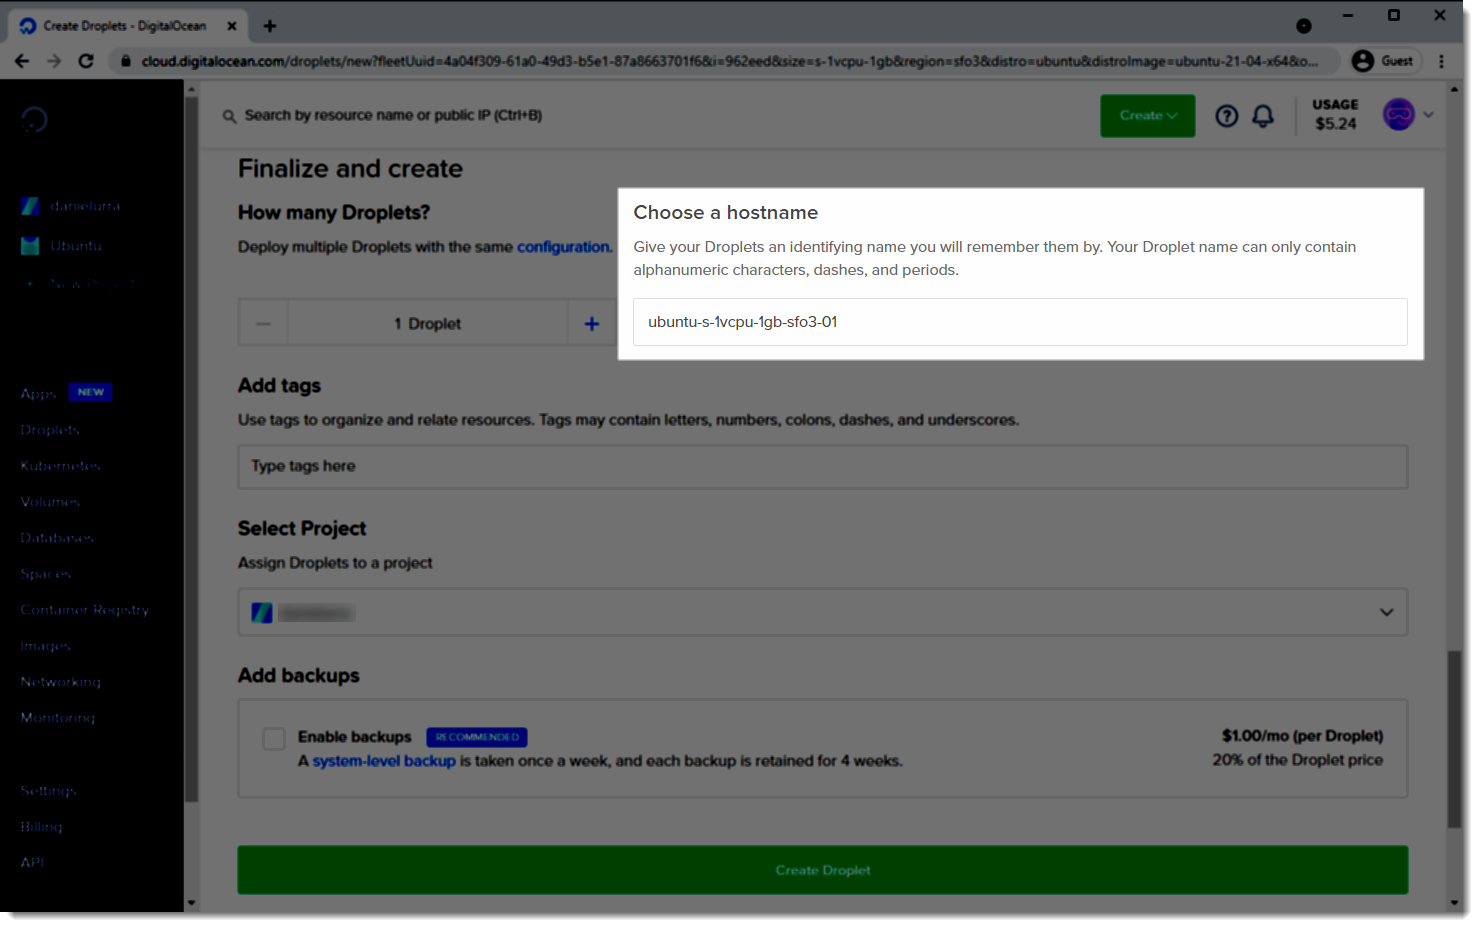
Step 7 – Droplet hostname
Choosing a droplet hostname is always a good idea, You’ll see the name selected here when you access the VPS via the terminal (CLI, aka console), if do not like what you see, then you can use the proper CLI command to rename your VPS.
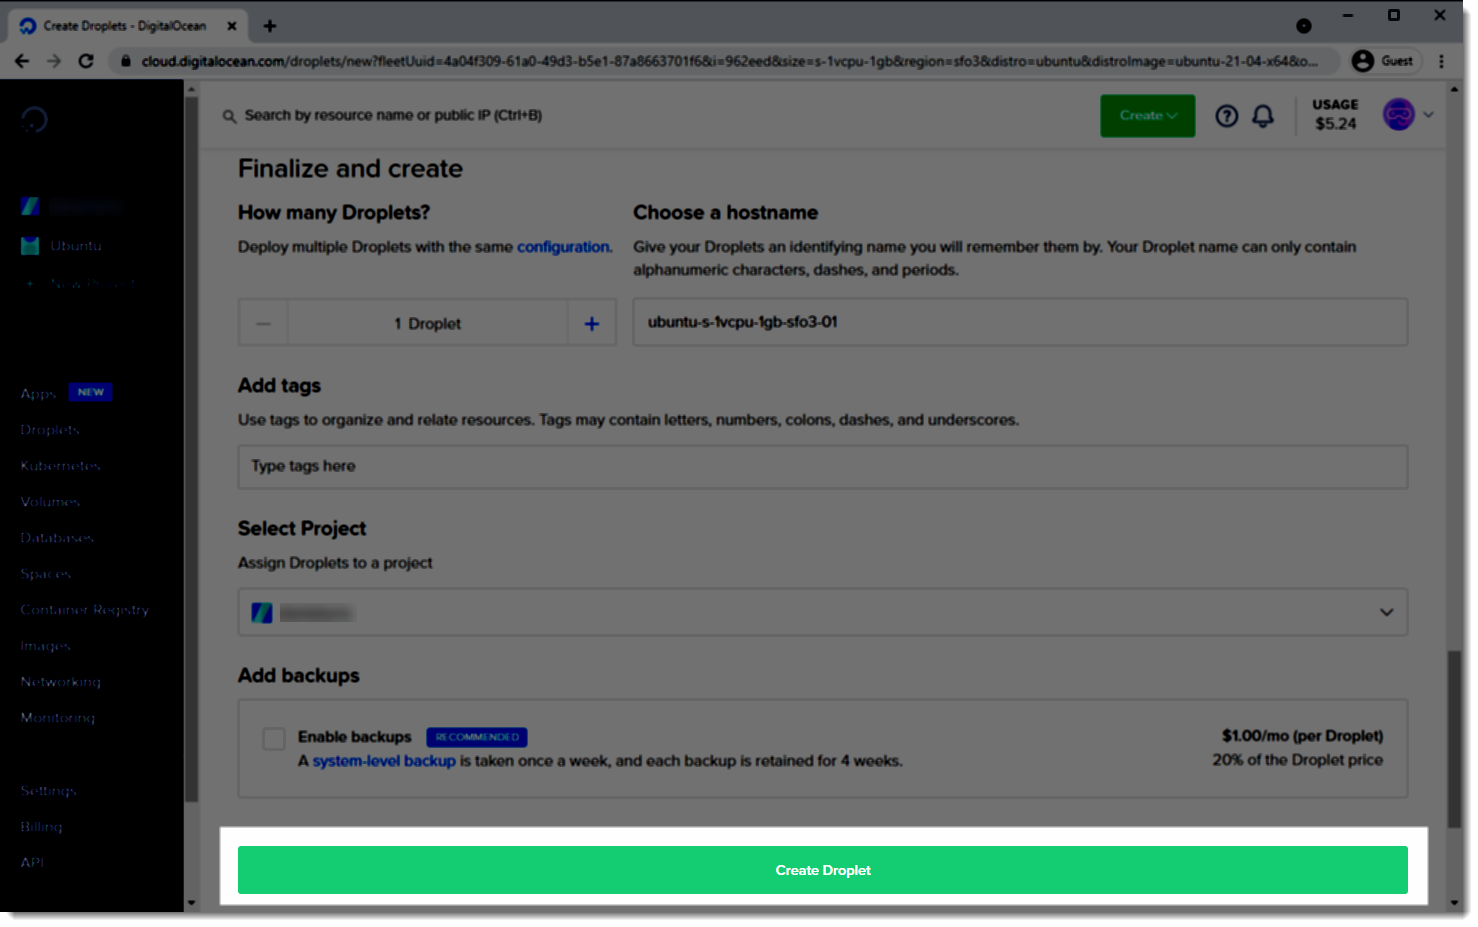
Step 8 – Create Droplet
We’ve finally reach the end of the process, after clicking the “Create Droplet” button your VPS will automatically start the creation that will only take a few seconds.
Where to go next?
Once the droplet creation process is completed you’ll be able to access your VPS via the CLI (aka terminal, aka console) using the terminal emulator of your preference, the IP Address of your VPS will be shown on the droplet details.